سفارش تبلیغ
صبا ویژن

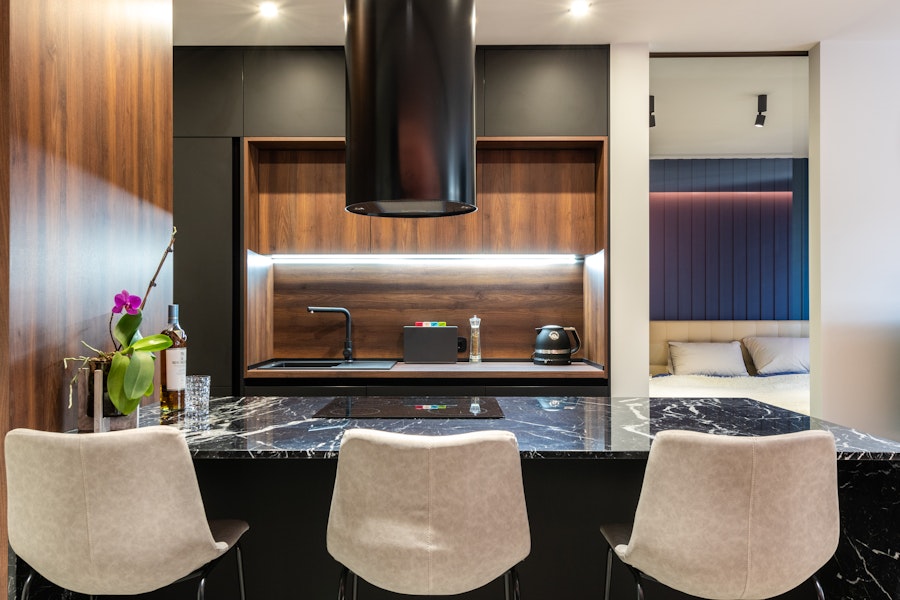
Plumbing Kitchen Sink Taps

If you are planning to replace your kitchen sink taps, here is some information to help you. Before you start the process, make sure you have the correct tools. You will need an adjustable spanner to loosen the valve and the flexible hose connections. You will also need to clean the tap"s hole as it may have sharp edges. After cleaning, insert the new tap into the hole of the sink. Be prepared to handle water dripping during the installation process.

interior


Consult a licensed plumber

Before you begin, it is important to know the plumbing codes in your area. Most states have adopted the International Plumbing Code, or IPC, as its official name implies. If your state is not one of them, then the Uniform Plumbing Code will be used instead. While plumbing codes tend to be similar across the country, there are slight differences. If you"re unsure about any code, you can consult a licensed plumber or your local building department.

Connect the valves

Before you begin the task of plumbing your https://www.nivito.ie taps, you should know how to shut the water supply in your home. Typically, the valves are located underneath your sink, so you can turn them off before beginning. If you"re not sure what valves are used for which faucets, you can consult a plumbing contractor to determine which parts you"ll need to replace. If you"re unsure of how to connect the valves, you can use a chain holding the drain stopper.

The vent pipe is another component you need to know. A wet vent requires an oversize vent pipe to be run underneath the sink. The water flows through the vent as a horizontal branch, while a standard dry vent must rise at a 45-degree angle. Almost certainly, the vent pipe coming off the trap arm is a dry vent, and needs to be adjusted accordingly. If you find yourself in this situation, you may want to consider a wet vent to avoid the hassles associated with installing a new kitchen sink tap.

Features of mixer taps

Mixer taps are another option that you have when plumbing kitchen sink taps. This type of faucet combines hot and cold water. It allows you to control the temperature of the water and saves you money. Many of these taps have a single hole, but you can also install two separate taps on the same sink. There are different sizes and models available, and each one has its own advantages and disadvantages. So, make sure to read up on them before you purchase your new kitchen sink taps.

If you have an older kitchen sink that you would like to upgrade, you can try removing it first. If it doesn"t work, you can always hire a plumber to help you. They have tools to help you resolve plumbing problems. However, you should make sure you clear the space under your kitchen sink before installing new ones. And, of course, plumbing a kitchen sink tap requires a lot of patience and a great deal of knowledge.


How to Replace Water Valve Under Kitchen Sink

In this article, we"ll show you how to replace the water valve under your kitchen sink. This simple repair is easier than you might think, and should only take a couple of hours. But before we get started, let"s review the steps involved. To replace the water valve under the sink, you"ll need to remove the old one and replace it with a new one. You"ll need to remove the water supply tube first, so you can access the lower compression nut. The new valve will then attach to the nut and ferrule.

kitchen

Turn off the main water valve

If the water valve under your black sinks in kitchens is leaking, it"s likely that it"s a leaky one. To fix a leak, you"ll need to disconnect the water supply. To do this, turn off the main water valve. To replace the valve, turn off the water valve"s main valve. If the leak is coming from a water line, replace the valve with a new one.

Kitchen

Next, locate the shut-off valve. Most kitchens have two shutoff valves, one for hot water and one for cold water. To identify these valves, you"ll need to know which one controls which type of water. You can easily spot them by their oval shapes. Once you find them, you can install the new shut-off valve. The replacement part is usually easily available at a home improvement store.

Need an adjustable wrench

The new water valve should be easy to install. To install it, you"ll need to find a pipe wrench and an adjustable wrench. Take care not to overtighten it. Once you"ve got the new valve on, connect the water supply tube to the faucet. Once the valve is firmly in place, turn on the water to the faucet and test it to see if it leaks. If the leak is only small, tighten the compression nut to fix it.

Kitchen interior design

Install the new valve

To install the new valve, remove the packing. Then, attach it to the water supply pipe. Secure it with the compression nut. Make sure not to overtighten the nut because it can damage the pipe. After the valve is firmly in place, reconnect the water supply line to the new valve. Once you"ve secured the pipe, you"re ready to connect the water supply line to the new valve.

Kitchen

The valve closest to the wall is often made of chrome-plated brass. If the valve is made of brass, it will usually be a straight stop valve. It is marked with a large compression nut. It can be purchased at any hardware store. But it may be hard to locate one of these at a low price. If you have the tools necessary, it"s a quick and easy fix for the problem.

In addition to removing the old valve, you can install a compression shutoff valve under the sink. These are simple to install and are easy enough for most homeowners to do. However, it is important to make sure you have a new supply line. If your old supply tube is corroded, it is better to replace it with a new one. Standard compression valves cost about $7. When you need to replace the valve, you should measure the length of the stub-out tube.


How to Replace a Kitchen Faucet Sprayer Head

Replacing the sprayer head on your mono mixer tap is a fairly simple job. To get started, turn off your water supply and drain any water left in the sink. You"ll need a small screwdriver and needle-nose pliers to do this. While the process is quick, it does require a little care and precision. Be sure to use plumbers tape to seal any joints and avoid leaks.

Kitchen interior design

Unscrew the old spray head


The first step is to unscrew the old spray head. It"s best to unthread the hose first so that it does not retract back into the faucet body. Once the hose is free, twist the threaded collar of the new spray head onto it. You can check for any water leaks by unplugging the faucet before re-installing the sprayer head. Once the new one is installed, re-check it for any water damage.

Depend on the size of faucet


Once the water drains, unscrew the spray head counterclockwise until the hose comes free. Then unscrew the hose from the nozzle, and insert the new one. Be sure to twist the threaded collar back onto the sprayer hose. Once the hose is free, reinstall the spray head to inspect for any leaks. You may need to replace the hose as well, depending on the size of your faucet.

interior

Next, disconnect the hose from the faucet"s water supply. You may need to consult a professional in this case. Before you disconnect the hose from the faucet, you need to remove the plastic weight that holds the hose in place. Once it is removed, feed the new spout through the spout. A new hose will fit into the old spout. You can then reconnect the hose using the pliers.

Replace the sprayer head


After you have disconnected the hose from the faucet, you can replace the sprayer head. A new one will fit into the old one. If you don"t want to replace the hose, you can buy a generic one instead. This way, you can make sure that the new one fits perfectly. You can also take the old hose with you if the replacement doesn"t fit in the spout.

Kitchen

If you"ve been wondering how to replace kitchen faucet sprayer head, you"ve come to the right place. To replace the sprayer head, you need to unscrew the flex line from the faucet body. The hose should be threaded. Then, unscrew the new one by twisting its collar. Once the hose is detached, you"ll need to pull out the hose. Then, you"ll need to unscrew the hose connector.

Remove the old hose


If the sprayer hose is attached with a quick-connect device, it is important to remove the old hose before installing the new one. The new head will screw onto the nipple of the faucet. Once you"ve removed the old hose, you"ll need to replace the faucet sprayer head. The new hose should fit well in the nipple. If you have a hard-to-reach sprayer, you should screw the hose onto the nipple to make sure that it fits properly.